A multifunctional vegetable cutter is a versatile tool designed to handle a variety of slicing, dicing, shredding, and julienning tasks efficiently. Ideal for both commercial kitchens and food processing facilities, this machine saves time and ensures consistent results. Here’s a step-by-step guide to using a multifunctional vegetable cutter and maximizing its efficiency.
Step 1: Understand the Machine’s Features
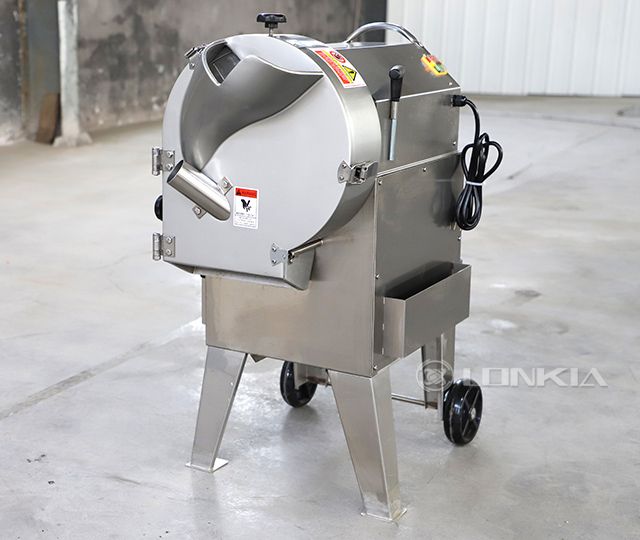
LONKIA’s multifunctional vegetable cutter comes equipped with various blades and settings to accommodate different types of cuts. Familiarize yourself with the main components:
- Blade Attachments: Each blade is suited for specific types of cuts, from fine julienne to large dices.
- Speed Settings: Adjustable speed controls help handle soft and hard vegetables.
- Safety Features: Emergency stop buttons and safety locks ensure secure operation.
Step 2: Prepare the Vegetables
Before using the machine, prepare your vegetables:
- Wash and Dry: Always wash vegetables thoroughly. Dry them as needed for a cleaner cut and to prevent excess moisture.
- Cut to Size: Large vegetables should be cut into manageable pieces to fit easily into the machine chute, ensuring an even cut and reducing machine strain.
Step 3: Choose the Correct Blade
Select the appropriate blade attachment based on the desired cut:
- Dicing Blade: Ideal for uniform cubes, perfect for salads or stir-fries.
- Slicing Blade: Suitable for thin slices, great for potatoes, cucumbers, or zucchini.
- Julienne Blade: Creates thin, matchstick-like strips, commonly used for carrots and garnishes.
- Shredding Blade: Useful for making coleslaw or shredded cabbage for wraps.
Step 4: Adjust the Speed Setting
Set the machine’s speed according to the vegetable’s hardness:
- Low Speed: Use for soft vegetables like tomatoes, mushrooms, and leafy greens to avoid crushing.
- High Speed: Ideal for harder vegetables such as carrots, potatoes, or squash, ensuring clean cuts.
Step 5: Place Vegetables into the Feed Chute
Place the prepared vegetables into the feed chute:
- Firmly Push Down: Use the plunger to push the vegetables into the blades, ensuring a smooth, even cut.
- Feed Gradually: Avoid overloading, as this may strain the motor or result in uneven cuts.
Step 6: Collect and Inspect
After cutting, collect the vegetables from the output tray and inspect for consistency:
- Uniformity Check: Ensure all pieces are the desired size and shape for optimal presentation.
- Adjust if Needed: If the cuts are not as desired, try adjusting speed or switching blades.
Step 7: Clean and Maintain the Machine
Proper cleaning is essential for hygiene and machine longevity:
- Turn Off and Unplug: Ensure the machine is turned off and unplugged before cleaning.
- Disassemble and Wash: Remove blade attachments and wash them with warm, soapy water.
- Wipe Down the Base: Use a damp cloth to clean the machine base, avoiding water on the motor area.
Benefits of Using LONKIA’s Multifunctional Vegetable Cutter
- Time Savings: Reduces prep time significantly, especially in high-volume kitchens.
- Consistency: Ensures uniform cuts, enhancing presentation and cooking consistency.
- Versatility: Handles various types of cuts, reducing the need for multiple kitchen tools.
Why Choose LONKIA’s Multifunctional Vegetable Cutter?
LONKIA’s vegetable cutters are built with food-grade materials, robust safety features, and a powerful motor that can handle any commercial kitchen’s demands. Each machine is designed for efficiency, reliability, and ease of use, making it a smart investment for any food processing setup.
Interested in learning more about our vegetable cutters? Contact us today to discuss your requirements and get a personalized quote.


